Application Tutorial:
a Restaurant app
Part I
- Introduction
- Modeling data
- The minimal model
- Deploying the app
- Numerical-types
- Stategroups
- Built-in attribute types
- References
- States versus references
- Next
Introduction
This tutorial teaches you to model data with the application language, the main language for building Alan apps.
Complete the IDE tutorial first, so that you have a project to work in.
In the application language you write an application model: the file models/model/application.alan.
That model expresses the core of your application: the structure of the data, computations over it, business processes, and who may see and change what.
You start with the most basic ingredient of a data-intensive application: base data.
Base data is the primary data an application needs to work, such as the menu of a meal ordering app.
It includes all states that matter to the application, such as the status of an order or a payment.
On top of the base data you express further aspects, such as the permissions required to read a piece of data, or a todo item for a rejected payment.
The tutorial follows one story and extends one model step by step. Most topics end with a reference to a tutorial folder in your project, so you can compare your model with the expected result.
The story: you own a restaurant. Business is going well, and you want to stay in control of what is going on before chaos sets in.
Alan is a platform with a language for modeling data and processes in a flexible, yet structured way. From the model you write, the platform generates a complete web application for entering data and reviewing the state of your restaurant. You never write the application itself; you describe what the data is, and the platform builds the app around it.
Modeling data
A restaurant is nothing without a good menu, so start there.
Menu
| Appetizer | Price (€) |
|---|---|
| Shrimp salad | 3.50 |
| Tomato soup | 4.50 |
| Ciabatta with tapenade | 2.50 |
| Main course | Price (€) |
|---|---|
| Beef stew | 18 |
| Grilled salmon | 16.50 |
| Mashed potato with sauerkraut | 14 |
| Dessert | Price (€) |
|---|---|
| Chocolate mousse | 4.50 |
| Vanilla ice cream | 3.50 |
| Cherry pie | 4 |
| Drinks | Price (€) |
|---|---|
| Orange juice | 4.50 |
| Spa rood | 3 |
| Heineken pilsner | 4.20 |
| Cappuccino | 3.50 |
| Mint tea | 3 |
| Mojito | 6.30 |
This menu holds five kinds of data:
- The item that can be ordered (
Item name) - The price per item in euro (
Selling price) - Whether it is a dish or a beverage (
Item type) - The type of dish or beverage (
Dish type/Beverage type) - And the fact that all of this together is a menu (
Menu)
A first model of such a menu looks like this:
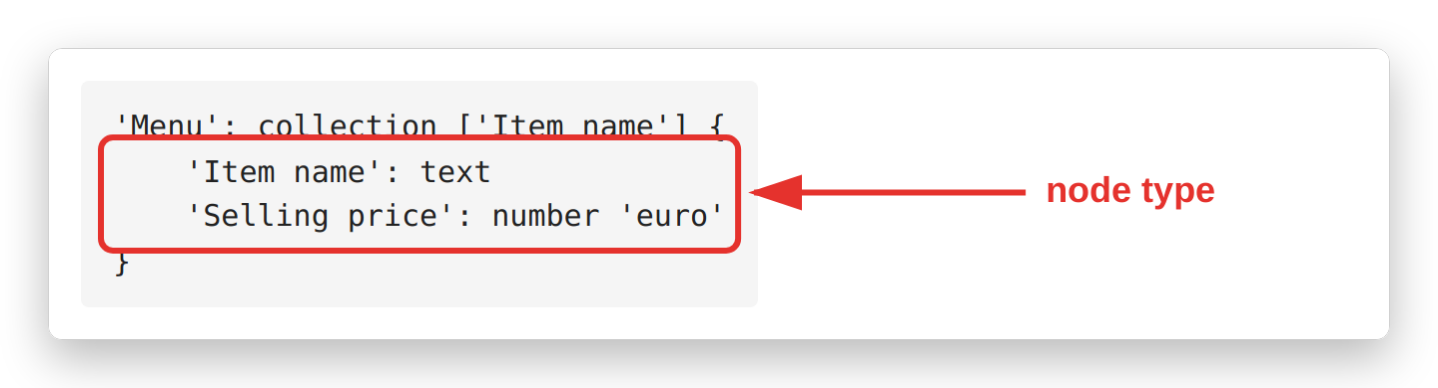
'Menu': collection ['Item name'] {
	'Item name': text
	'Selling price': number 'euro'
}
This small, unfinished model says that a Menu is a collection: a collection of menu items.
Each menu item has an Item name and a Selling price, and is uniquely identified by its Item name, such as ‘Chocolate mousse’.
The ['Item name'] after collection expresses exactly that: Item name is the key attribute, and a value like ‘Chocolate mousse’ is a key.
A single menu item — an Item name together with a Selling price, for example ‘Chocolate mousse’ and 4.50 — is called a node.
A Menu collection stores such nodes.
In the model, the curly braces ( { … } ) and everything between them define the type of a node.
Item name holds a value of type text: a piece of text.
Selling price holds a value of type number, and the model states what the number means: euro.
Item name and Selling price are attributes of a node type.
The keywords text and number express the types of those attributes: an attribute type specifies which values an attribute can hold.

The minimal model
To turn the Menu model into an app, put it inside a complete model.
Open models/model/application.alan and write down the sections that every application model has, if they are not already there:
users
	anonymous

interfaces

root { }

numerical-types
This is the minimal model: the smallest model the Alan platform accepts.
The users section defines who can access the application and how.
Use anonymous for now, which means that anyone can open the app and read and edit its data.
The application language documentation describes the other options.
The interfaces section defines which other apps and databases this app is connected to.
For this tutorial the app stays disconnected.
The root { } section defines the root node type.
This is where modeling starts: one single root node holds all application data.
Paste the Menu model from the previous section between its braces.
The numerical-types section defines the units used in the application and how to interpret them.
The Selling price of a menu item is in 'euro', so add 'euro' there.
The model now looks like this:
users
	anonymous

interfaces

root {
	'Menu': collection ['Item name'] {
		'Item name': text
		'Selling price': number 'euro'
	}
}

numerical-types
	'euro'
One rule while typing Alan code: separate keywords with whitespace. Indentation is free — spaces and tabs are both accepted, and the Alan formatter normalizes indentation to tabs for you.
Deploying the app
To run this app, the model has to be translated into code that a server can execute.
A compiler does that; it is part of the Alan platform tools.
Download those tools with Alan Fetch in VS Code, or with ./alan fetch from the command line.
Alan Fetch reads the versions.json file in the project root to determine which versions of the tools it needs.
After fetching, the Alan language server starts by itself and checks every .alan file in the project — models, migrations, and the rest — while you type.
Its findings appear in the Problems panel and are underlined in the editor, so most mistakes surface long before you build anything.
To build (compile) the whole project yourself, use Alan Build, or ./alan build from the command line.
A build reports nothing when the project is valid, and reports errors when it is not.
Once the build succeeds, run Alan Deploy to turn the project into a running app.
Alan Deploy asks for a ‘data source for this deployment’.
Choose the empty option for the first deployment.
The migrate option keeps the data of an already running app, which is what you use for every later deployment in this tutorial; the migrations guide explains how that works.
If deployment or migration ever gets stuck, start over with a clean slate:
- delete the
migrationsfolder, - run
Alan Deployand choose the empty option, - run
Alan Deployagain and choose the migrate option.
Open the app in a Chromium-based browser such as Chrome or Edge, and click Menu in the left column:
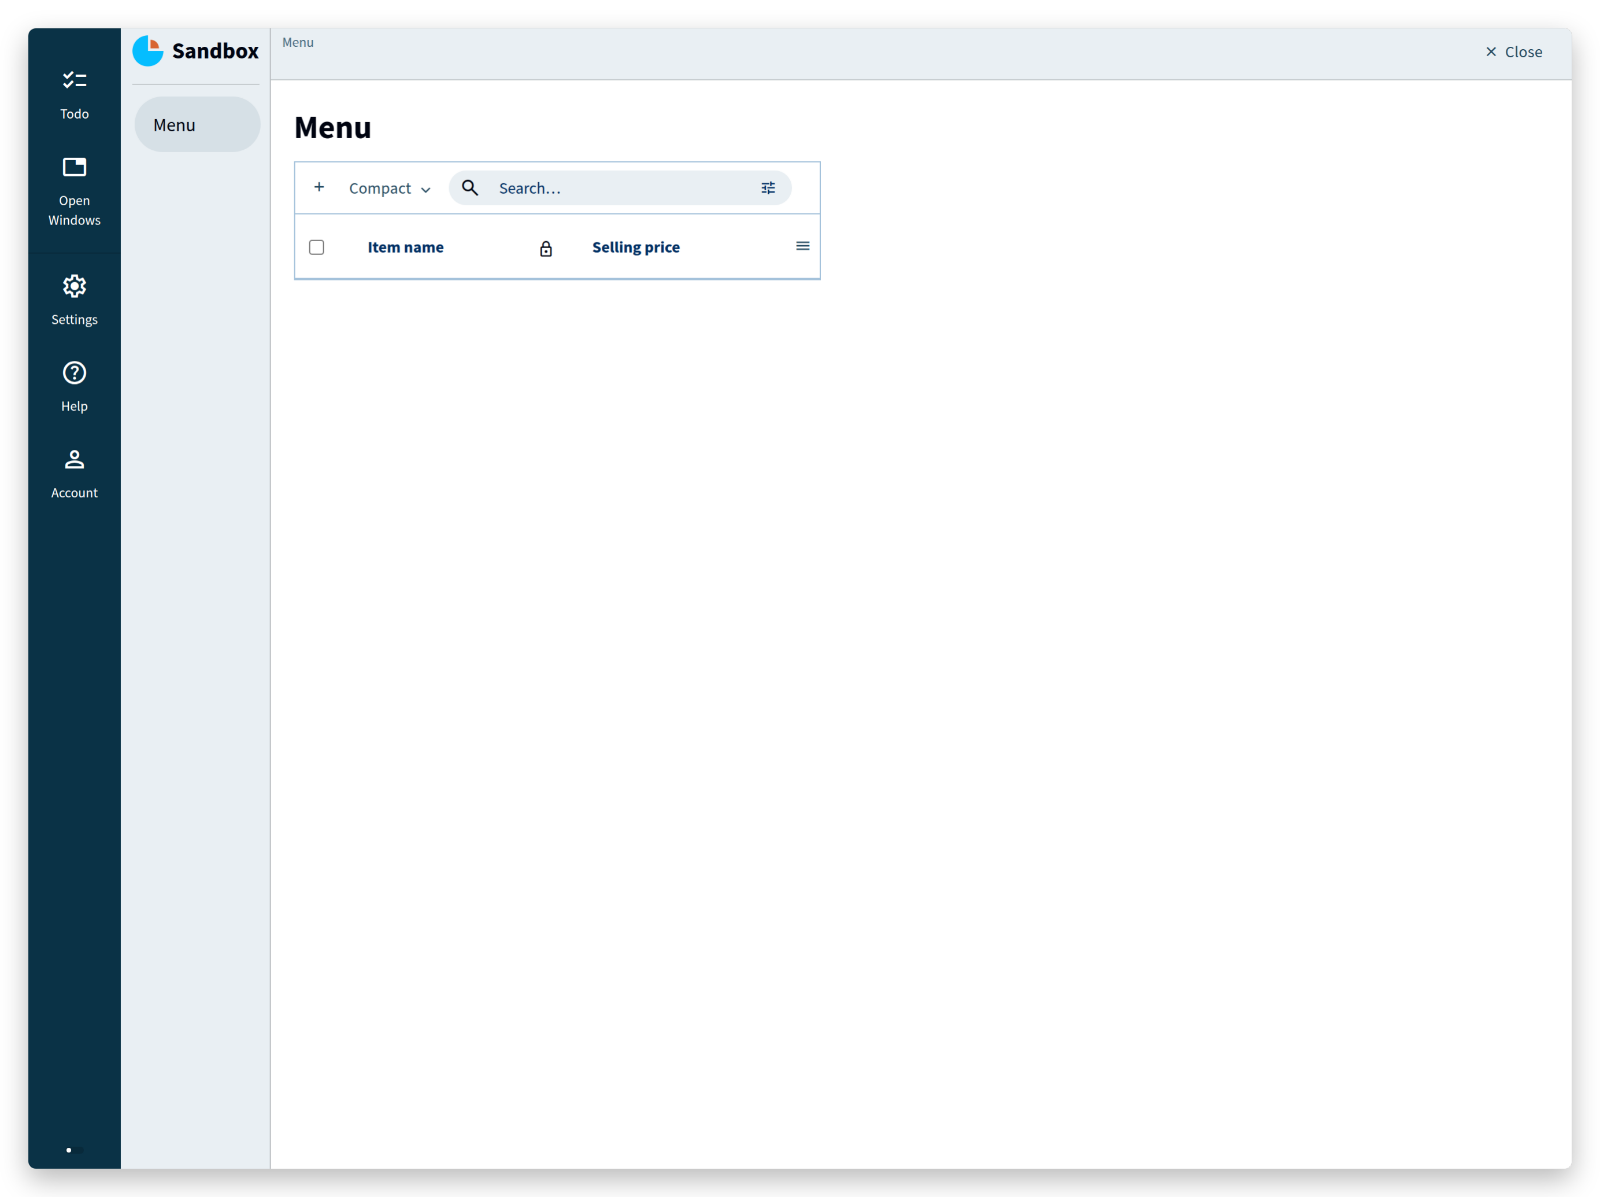
Add a few menu items to get a feel for the graphical user interface (GUI).
Click the + button above the table to add an item, fill in its fields, and click Save and then Close in the top right corner.
That returns you to the Menu table, where you can add more items and edit existing ones.
Typing test data by hand after every model change gets tedious, so the tutorial ships data for each step in the _docs folder.
To load the data for a step:
- run
Alan Deployand choose the migrate option, which creates the foldermigrations/from_release, - open
_docs/tutorials/restaurant1/2026.2/step_01/migration/migration.alan(step_01for this step), - copy its contents over the contents of
migrations/from_release/migration.alan, - run
Alan Deployagain and choose the migrate option.
After the deployment succeeds, the data is in your app.
<tutorial folder:
./_docs/tutorials/restaurant1/2026.2/step_01/>
Numerical-types
A price entered with decimals is rounded to a whole number:
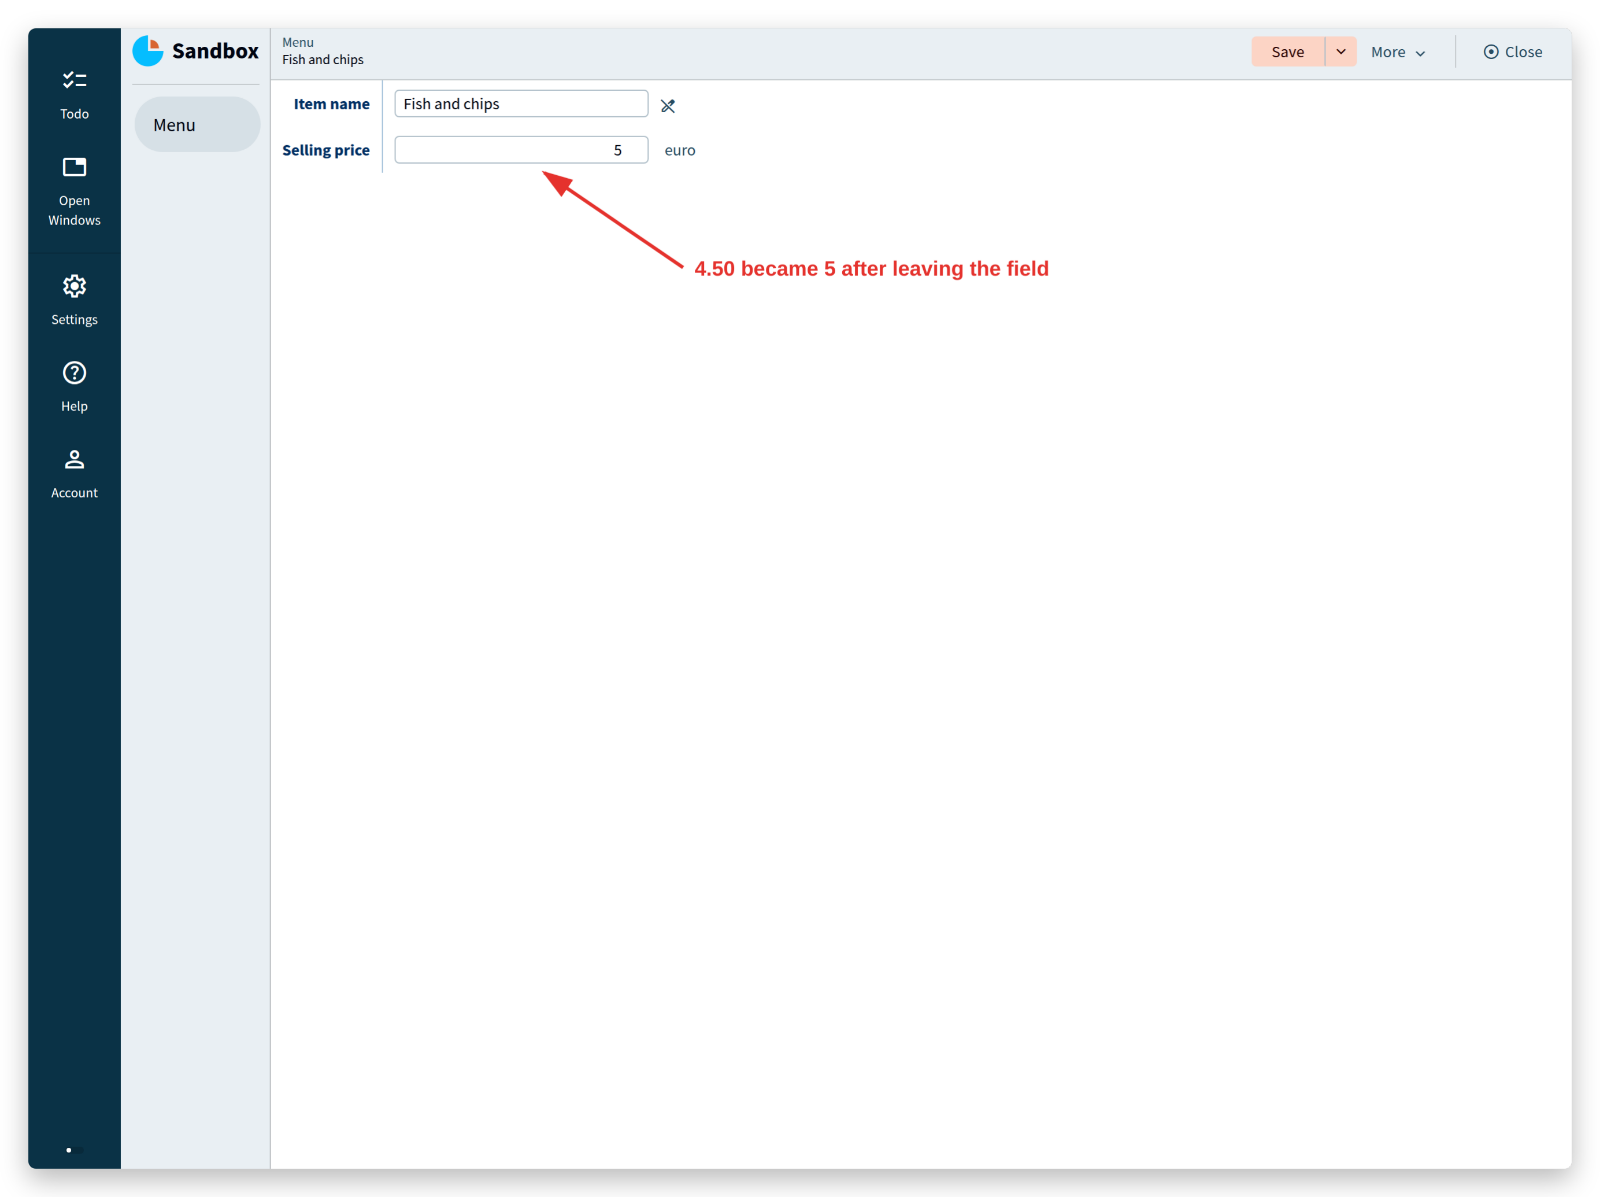
That happens because Alan stores whole numbers only. To keep the cents, pick a numerical type with the accuracy you need, and tell the GUI how to display it.
Change euro at the Selling price to eurocent, and make the numerical-types section look like this:
numerical-types
	'eurocent'
		@numerical-type: (
			label: "Euro"
			decimals: 2
		)
The @numerical-type: part is a GUI annotation: an instruction for the graphical user interface of the app.
It sets the label to show (Euro instead of eurocent) and the number of decimals a user may enter — 2, because the underlying accuracy is eurocent.
There is much more to numerical types; this is enough for now.
For a better understanding of the syntax, read the syntax guide.
Stategroups
A menu item carries more information than a name and a price.
A first example: an item is either a dish or a beverage.
Add an Item type for that:
root {
	'Menu': collection ['Item name'] {
		'Item name': text
		'Selling price': number 'eurocent'
		'Item type': stategroup (
			'Dish' { }
			'Beverage' { }
		)
	}
}
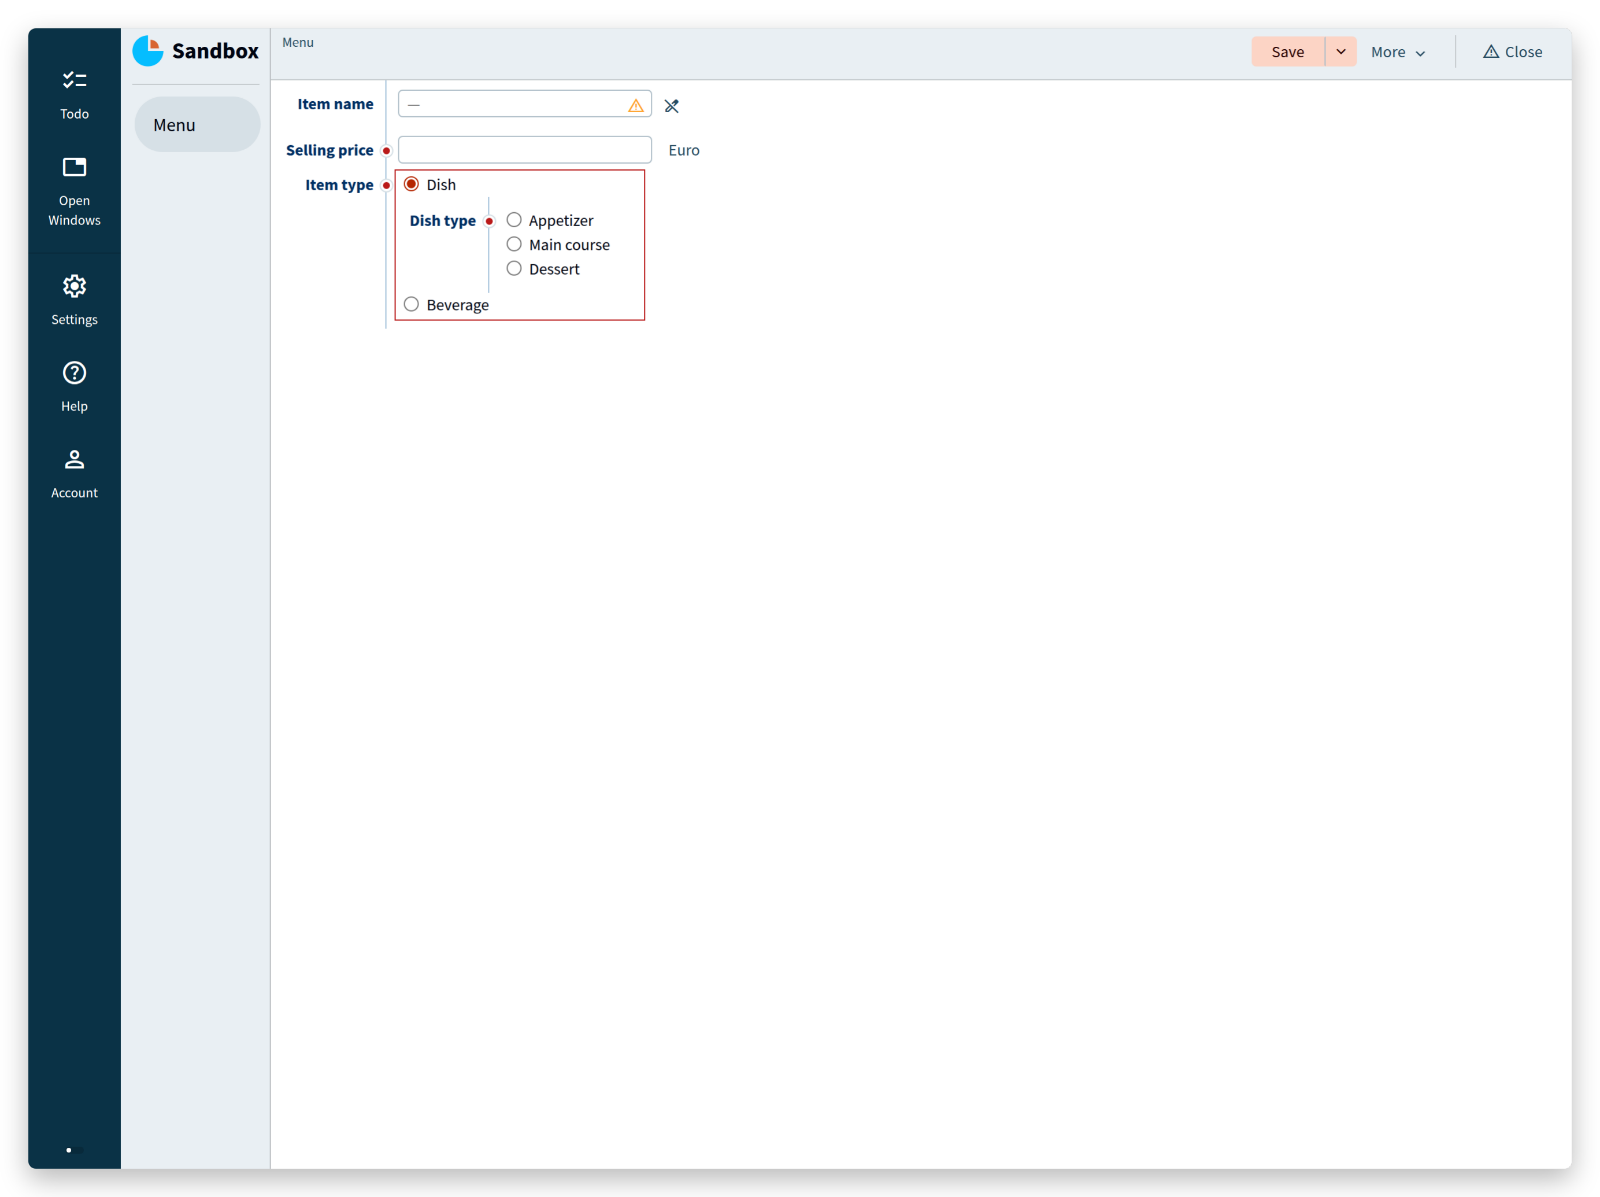
Item type is a stategroup attribute: it holds a choice between states, here Dish or Beverage.
Each state has its own curly braces, and attributes inside those braces belong to that state alone.
The data stored therefore depends on the state a user chooses.
A dish, for instance, is an appetizer, a main course, or a dessert — another choice.
Add a Dish type stategroup inside the state Dish, and something similar for Beverage:
root {
	'Menu': collection ['Item name'] {
		'Item name': text
		'Selling price': number 'eurocent'
		'Item type': stategroup (
			'Dish' {
				'Dish type': stategroup (
					'Appetizer' { }
					'Main course' { }
					'Dessert' { }
				)
			}
			'Beverage' {
				'Beverage type': stategroup (
					'Juice' { }
					'Soft drink' { }
					'Cocktail' { }
					'Beer' { }
					'Wine' { }
					'Coffee & tea' { }
				)
			}
		)
	}
}
An application model is hierarchical, and so is the data it describes.
The root node holds a collection of menu items.
Each menu item is a node with an Item type that is either Dish or Beverage.
Dish and Beverage are nodes themselves, holding a Dish type and a Beverage type respectively.
A Dish type is Appetizer, Main course or Dessert; a Beverage type is Juice or one of the other states in the model.
<tutorial folder:
./_docs/tutorials/restaurant1/2026.2/step_02/>
Build and deploy to see what stategroups and numerical types do for the app.
Before deploying, copy the migration.alan file from the tutorial folder to migrations/from_release/migration.alan as described above, and choose the migrate option.
Repeat that in every following step of the tutorial.
Set the view to Full to see all columns:
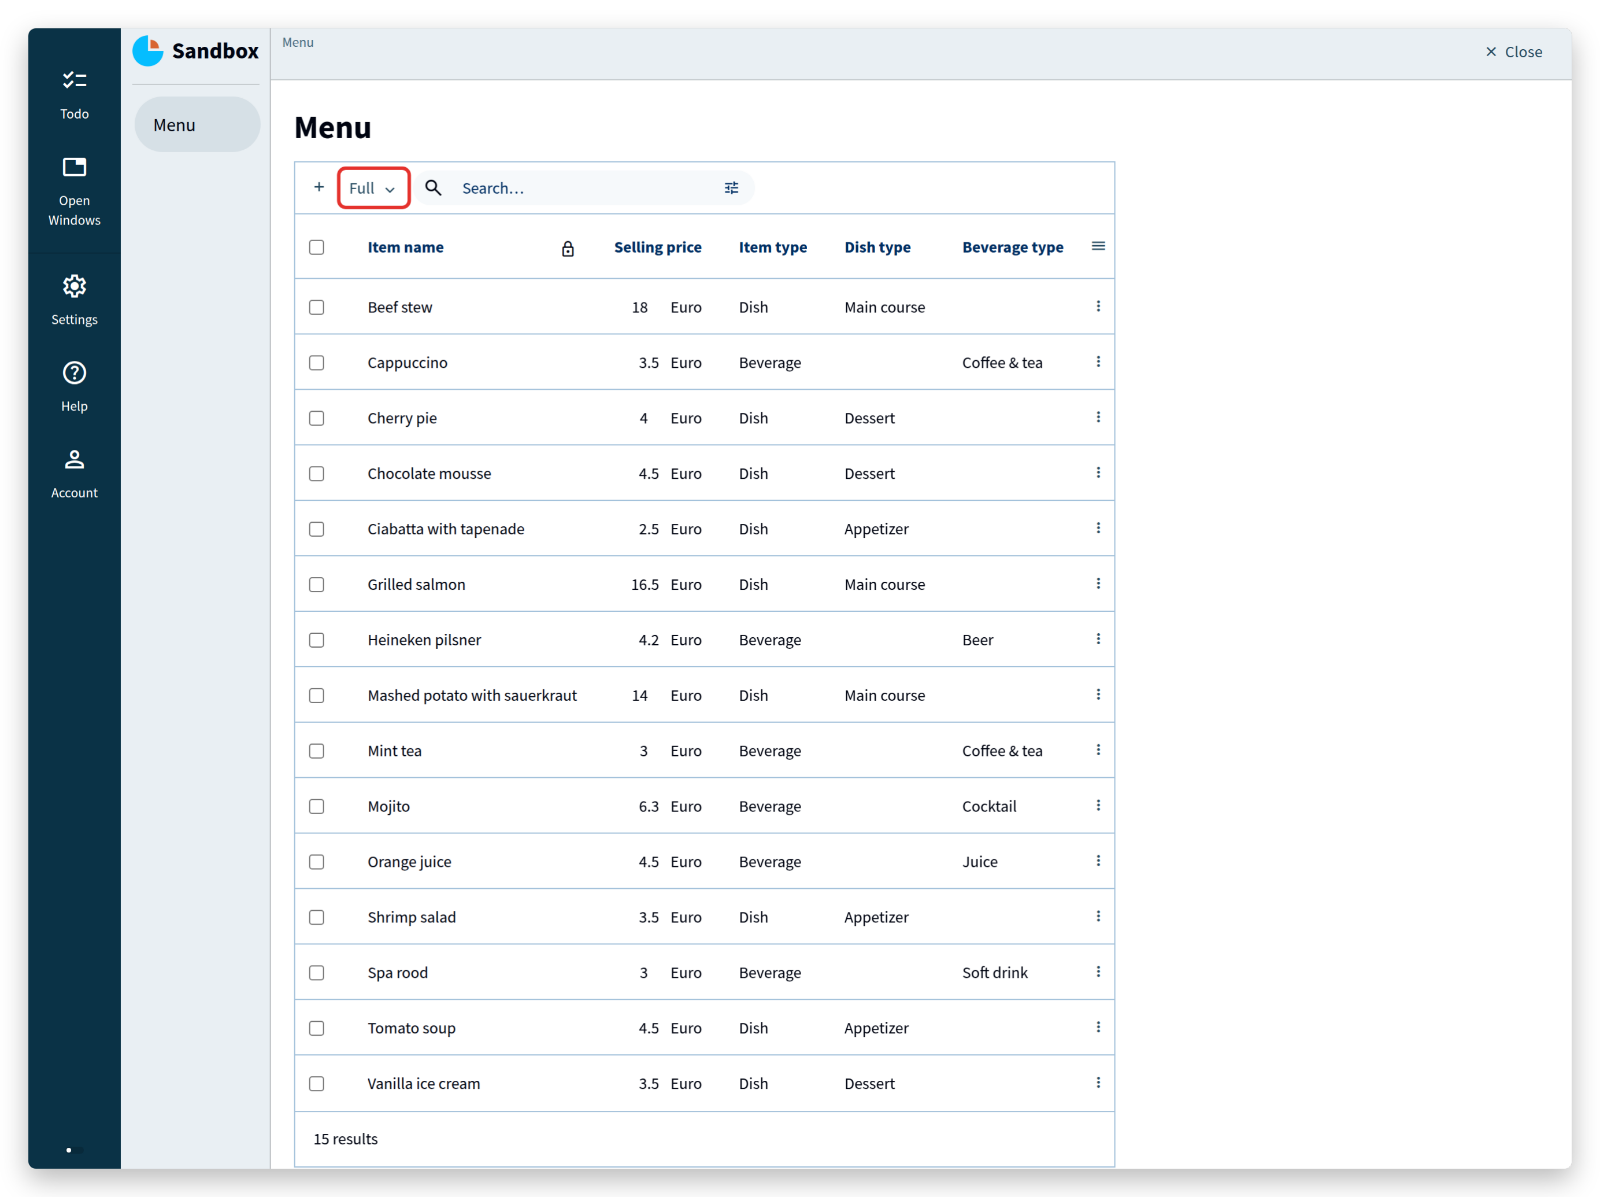
The table has a few more columns now. Add an item yourself, and the new stategroup attributes appear as radio buttons:
Built-in attribute types
A restaurant is more than a menu; it also has tables. Express that in the model:
root {
	'Menu': collection ['Item name'] {
		'Item name': text
		'Selling price': number 'eurocent'
		'Item type': stategroup (
			'Dish' {
				'Dish type': stategroup (
					'Appetizer' { }
					'Main course' { }
					'Dessert' { }
				)
			}
			'Beverage' {
				'Beverage type': stategroup (
					'Juice' { }
					'Soft drink' { }
					'Cocktail' { }
					'Beer' { }
					'Wine' { }
					'Coffee & tea' { }
				)
			}
		)
	}

	'Tables': collection ['Table number'] {
		'Table number': text
		'Seatings': number 'chairs'
		'Orders': collection ['Order line'] {
			'Order line': text
			'Item': text -> ^ ^ .'Menu'[]
			'Amount': number 'units'
		}
	}
}
The numerical types chairs and units are new to the model, so add them as well:
numerical-types
	'eurocent'
		@numerical-type: (
			label: "Euro"
			decimals: 2
		)
	'chairs'
	'units'
Deploy, and click Tables in the left column.
The table numbers and their seatings are already there:
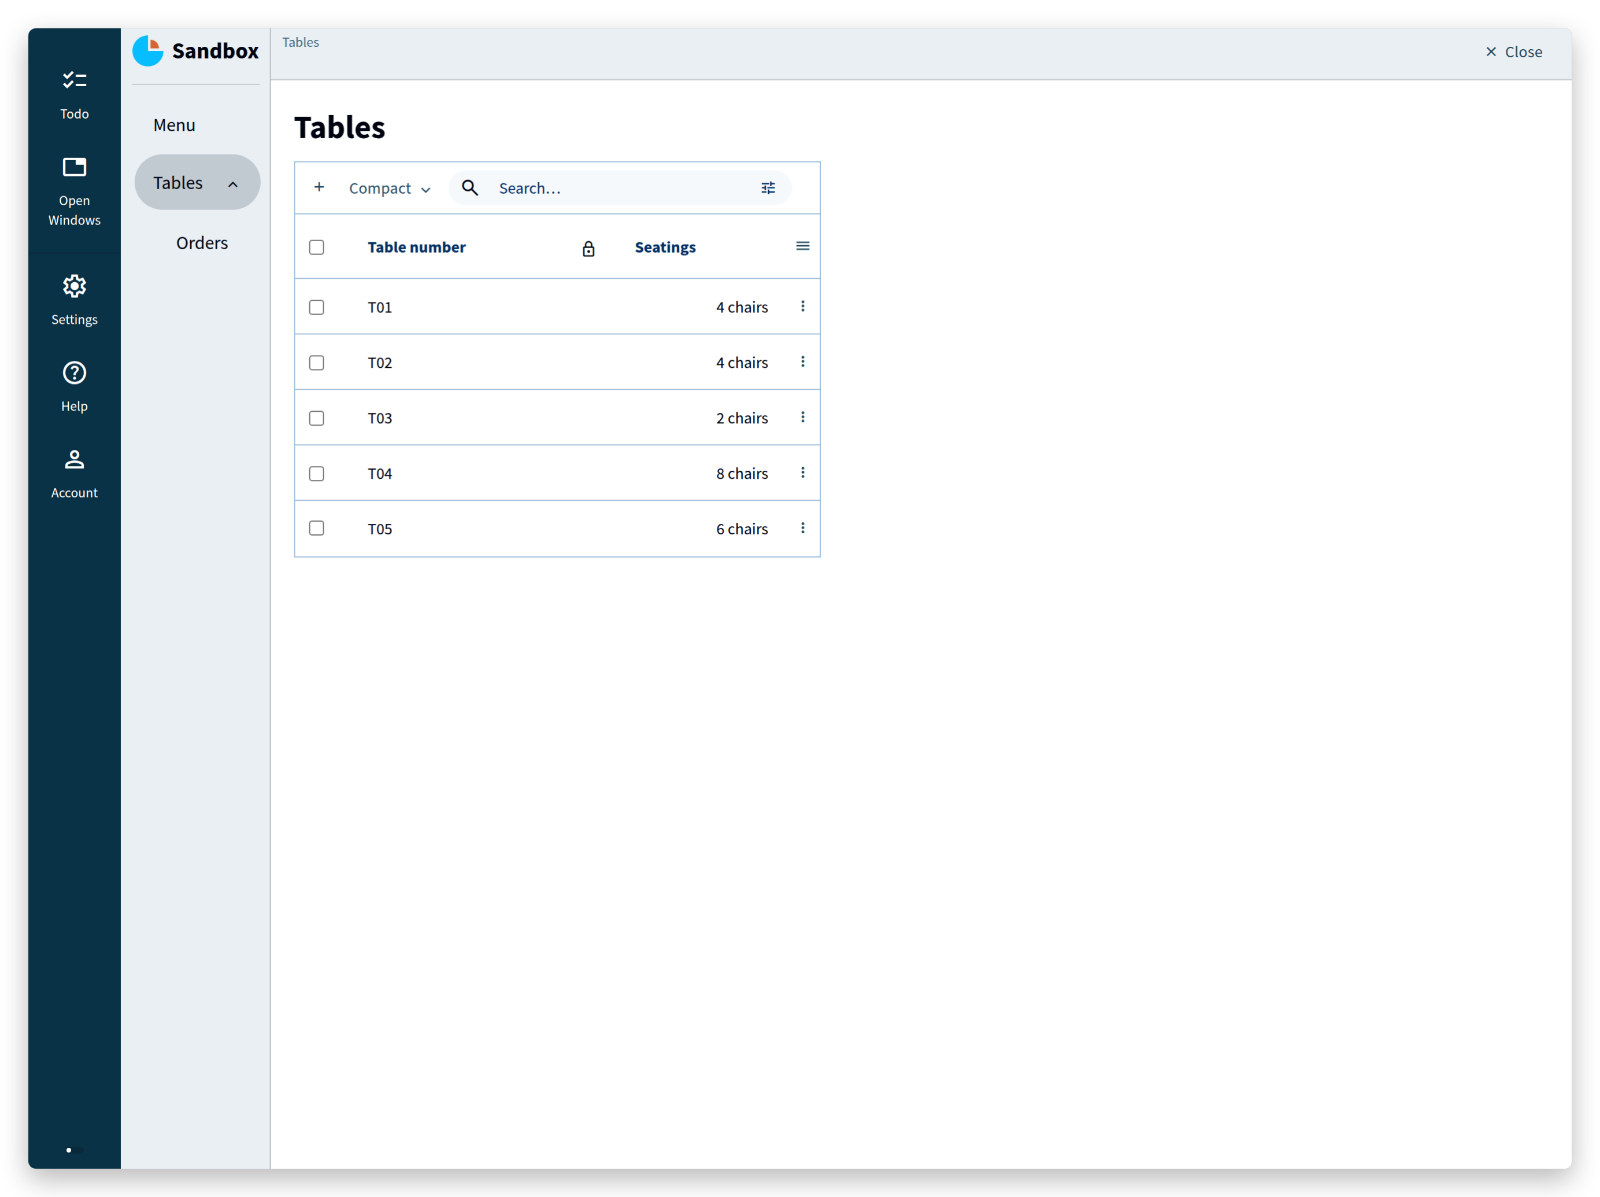
In the left column, Orders appears underneath Tables, exactly as in the model: the collection Tables nests a collection Orders.
Each table therefore has its own collection of orders, and each order line records an Item and an Amount:
| Order line | Item | Amount |
|---|---|---|
| 01 | Orange juice | 2 |
| 02 | Tomato soup | 2 |
| 03 | Beef stew | 2 |
| 04 | Chocolate mousse | 1 |
| 05 | Cappuccino | 1 |
<tutorial folder:
./_docs/tutorials/restaurant1/2026.2/step_03/>
Overview of attribute types
The application language has six built-in attribute types.
- A text attribute holds an unbounded string value (for example “this is text”).
- A number attribute holds an integer value (for example 31415927).
- A file attribute holds two unbounded string values: a file token and a file extension (for example “screenshot” and “png”).
- A collection attribute holds a set of nodes, each identified by a unique key, so that every node can be referenced unambiguously. The key is defined by the collection; the nodes have an inline defined node type.
- A stategroup attribute holds one state out of a fixed set of alternatives, such as
'Main course'. Each state can hold its own attributes. - A group attribute holds a node of an inline defined node type. Groups add structure by grouping attributes that belong together or that share permission requirements.
References
One line in the model deserves attention:
'Item': text -> ^ ^ .'Menu'[]
It says that the Item of an order line refers to a menu item.
See first what that means in the app.
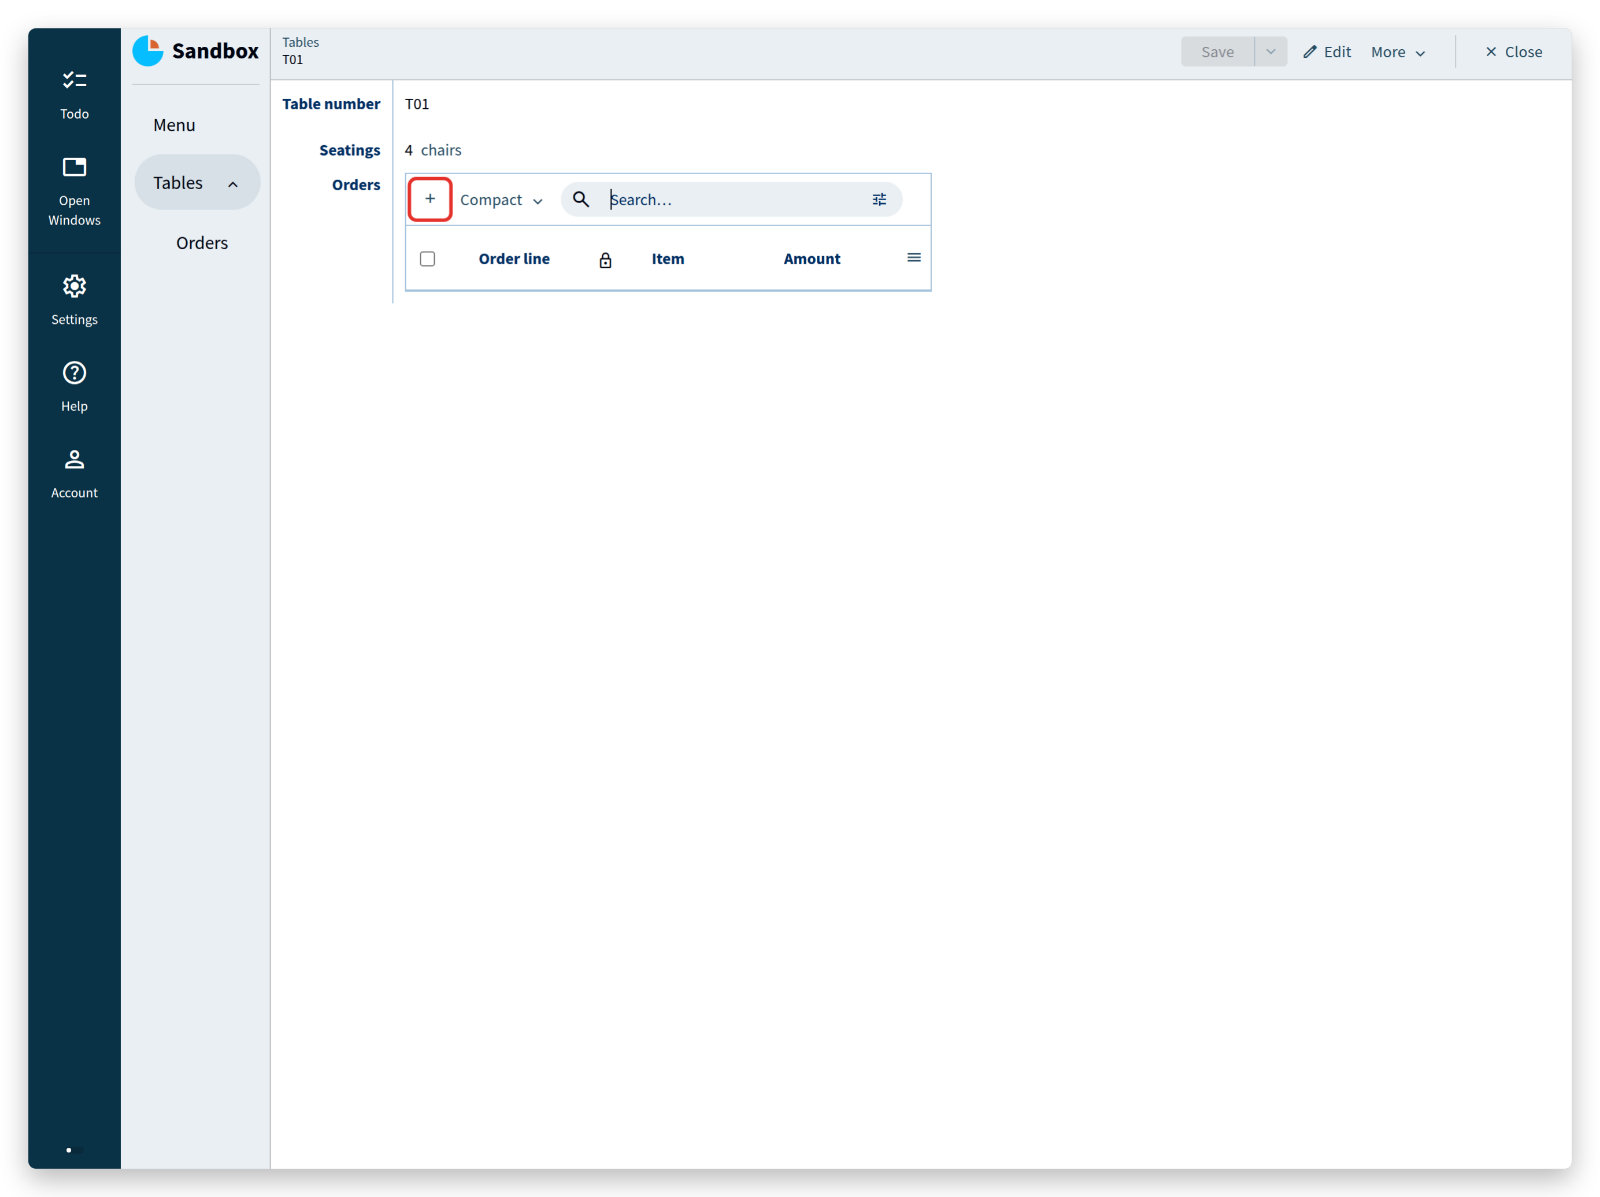
Click Tables in the left column, click table “T01” from the list, and click the + button next to Orders:
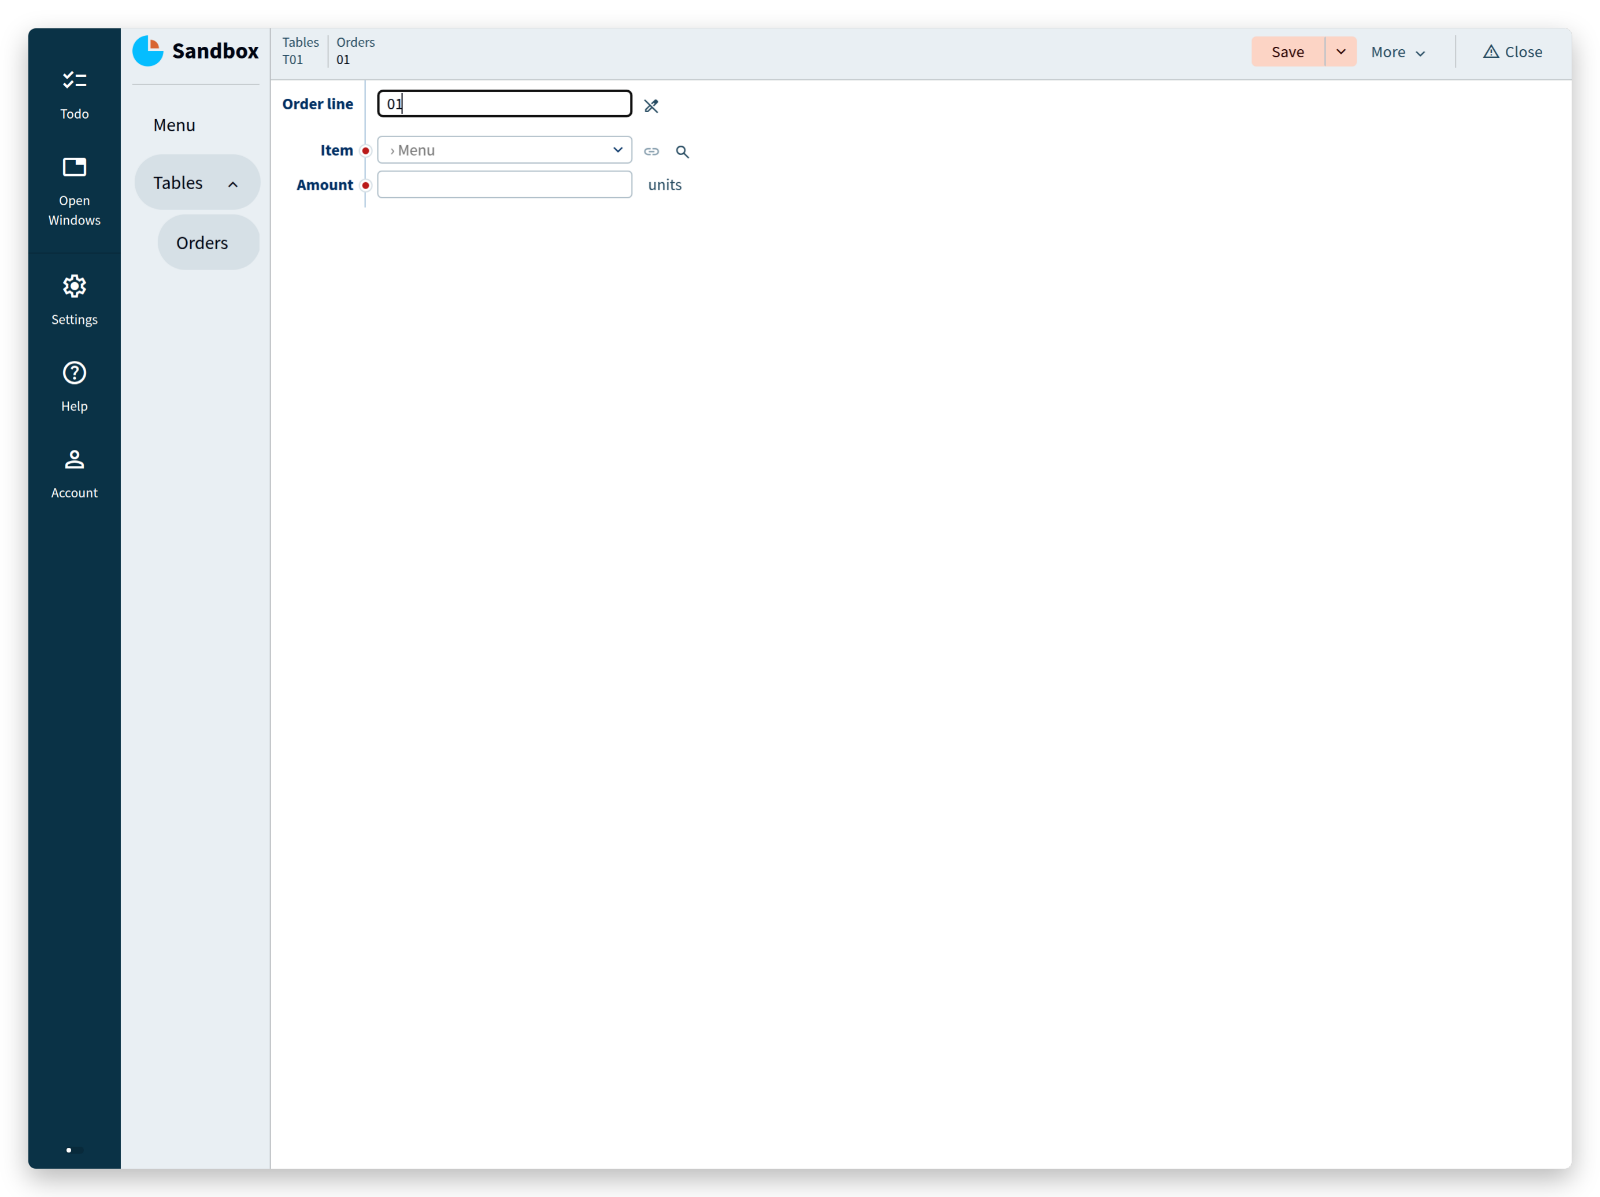
Enter an Order line, for example “01” for the first order at this table:
Click the magnifier next to the Item field:
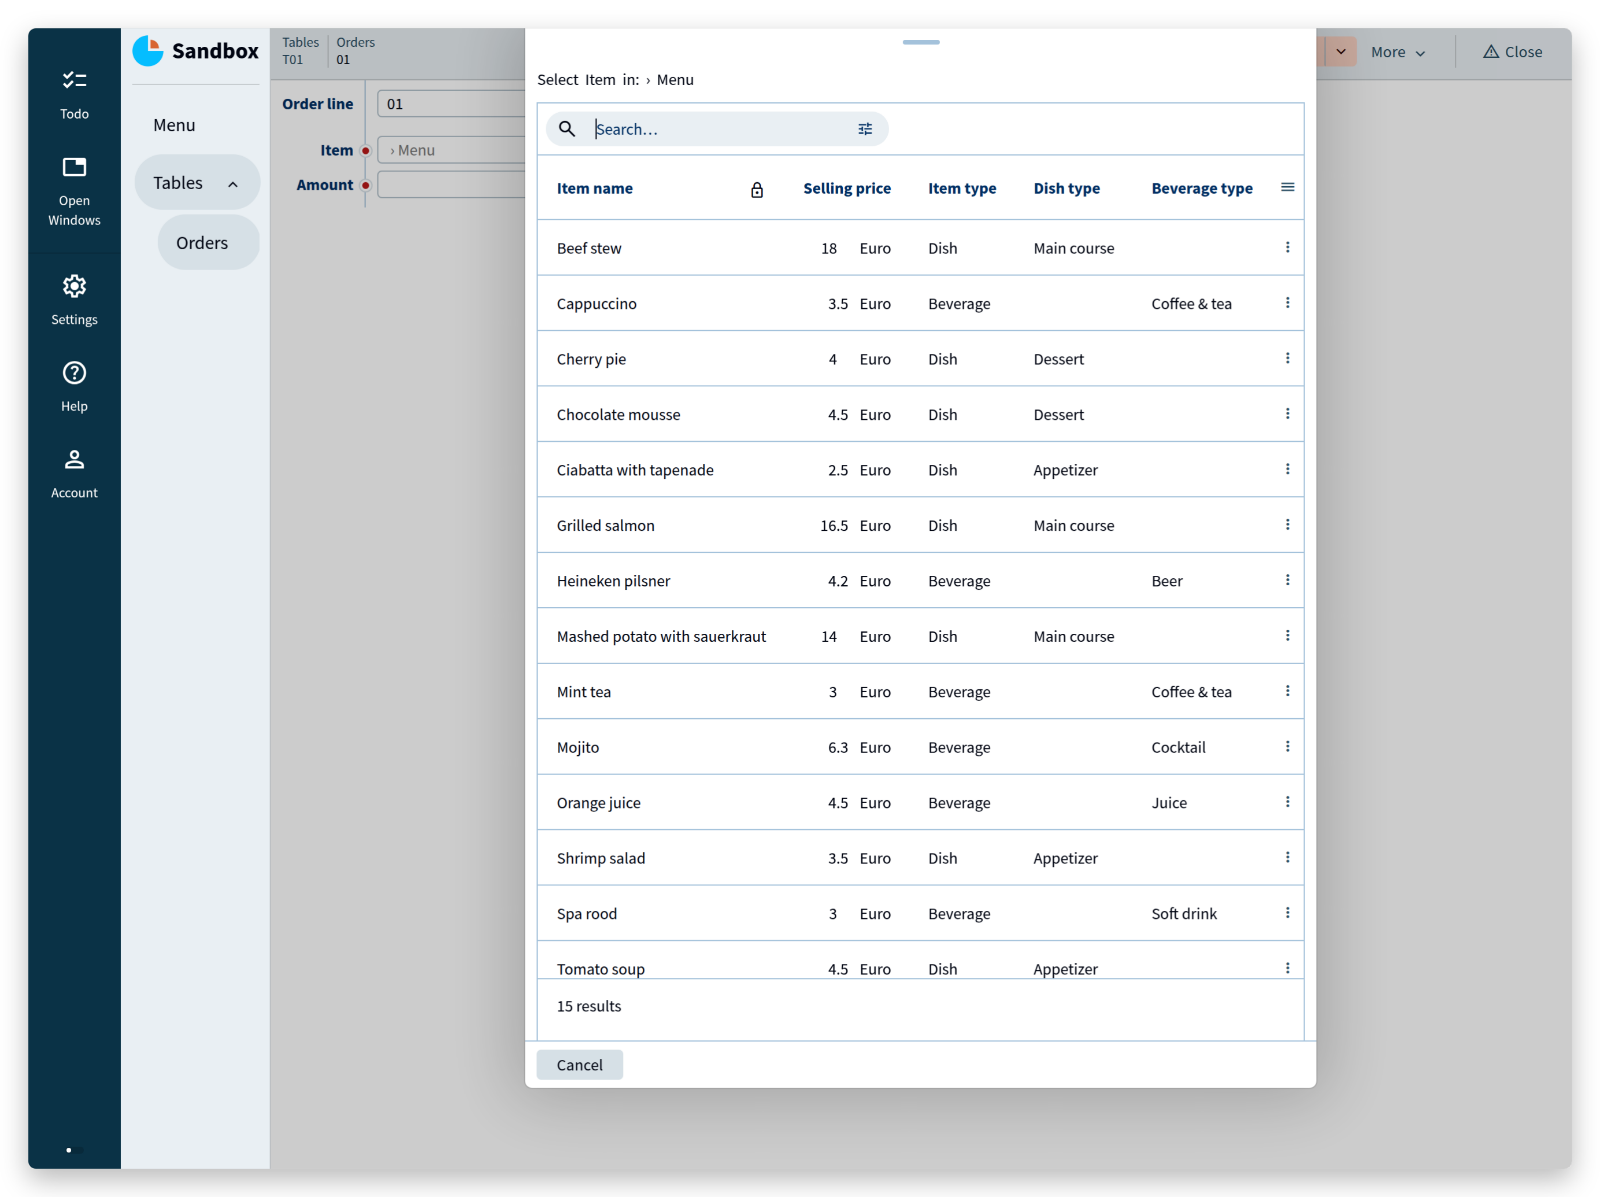
This shows the items from the Menu, and typing in the search box filters them.
Only an item from this list can be chosen.
Clicking an item puts its Item name in the field:
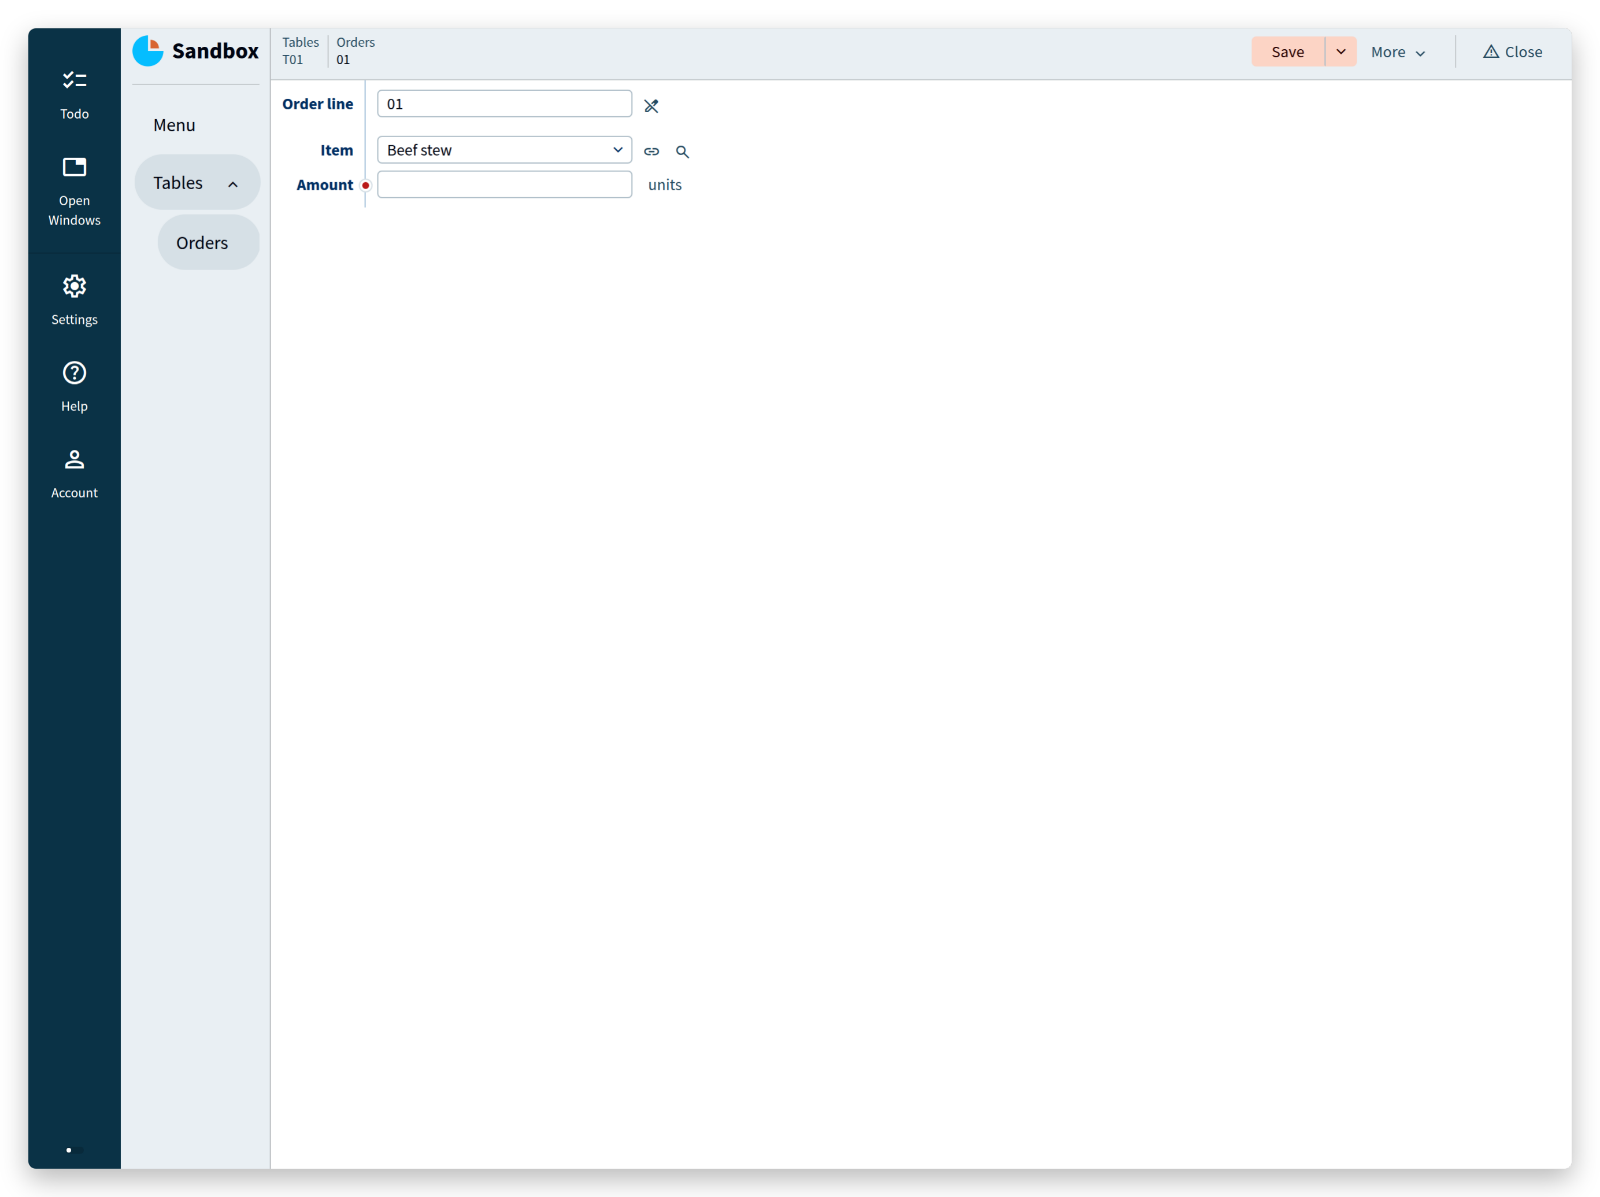
The Item name is the key of a menu item.
It identifies that item unambiguously, which is exactly what makes it usable as a reference.
Next to the field, the link icon takes you from Beef stew to the menu item it refers to.
The Item field accepts nothing but the Item name of an existing menu item.
That restriction comes from the arrow -> in the model, which expresses a mandatory reference.
The navigation expression after the -> tells the application where to find the referenced collection.
The keyword ^ means: go to the parent node.
For an order line, the parent is a table; a second ^ leads from the table to the root node, which holds the Menu.
The expression ends with .'Menu'[], which means: look up the value of Item in the Menu collection.
To see where a series of ^ leads, count the opening curly braces ({) above the expression: each brace corresponds to one node, and each ^ to one step up:
root {
	'Tables': collection ['Table number'] {   // curly brace 2 (match second ^)
		'Orders': collection ['Order line'] { // curly brace 1 (match first ^)
			'Item': text -> ^ ^ .'Menu'[]
			...
In summary:
Itemis a text value that references a menu item, so its value has to equal theItem nameof an existing menu item.
Enter an amount, click Save and then Close:
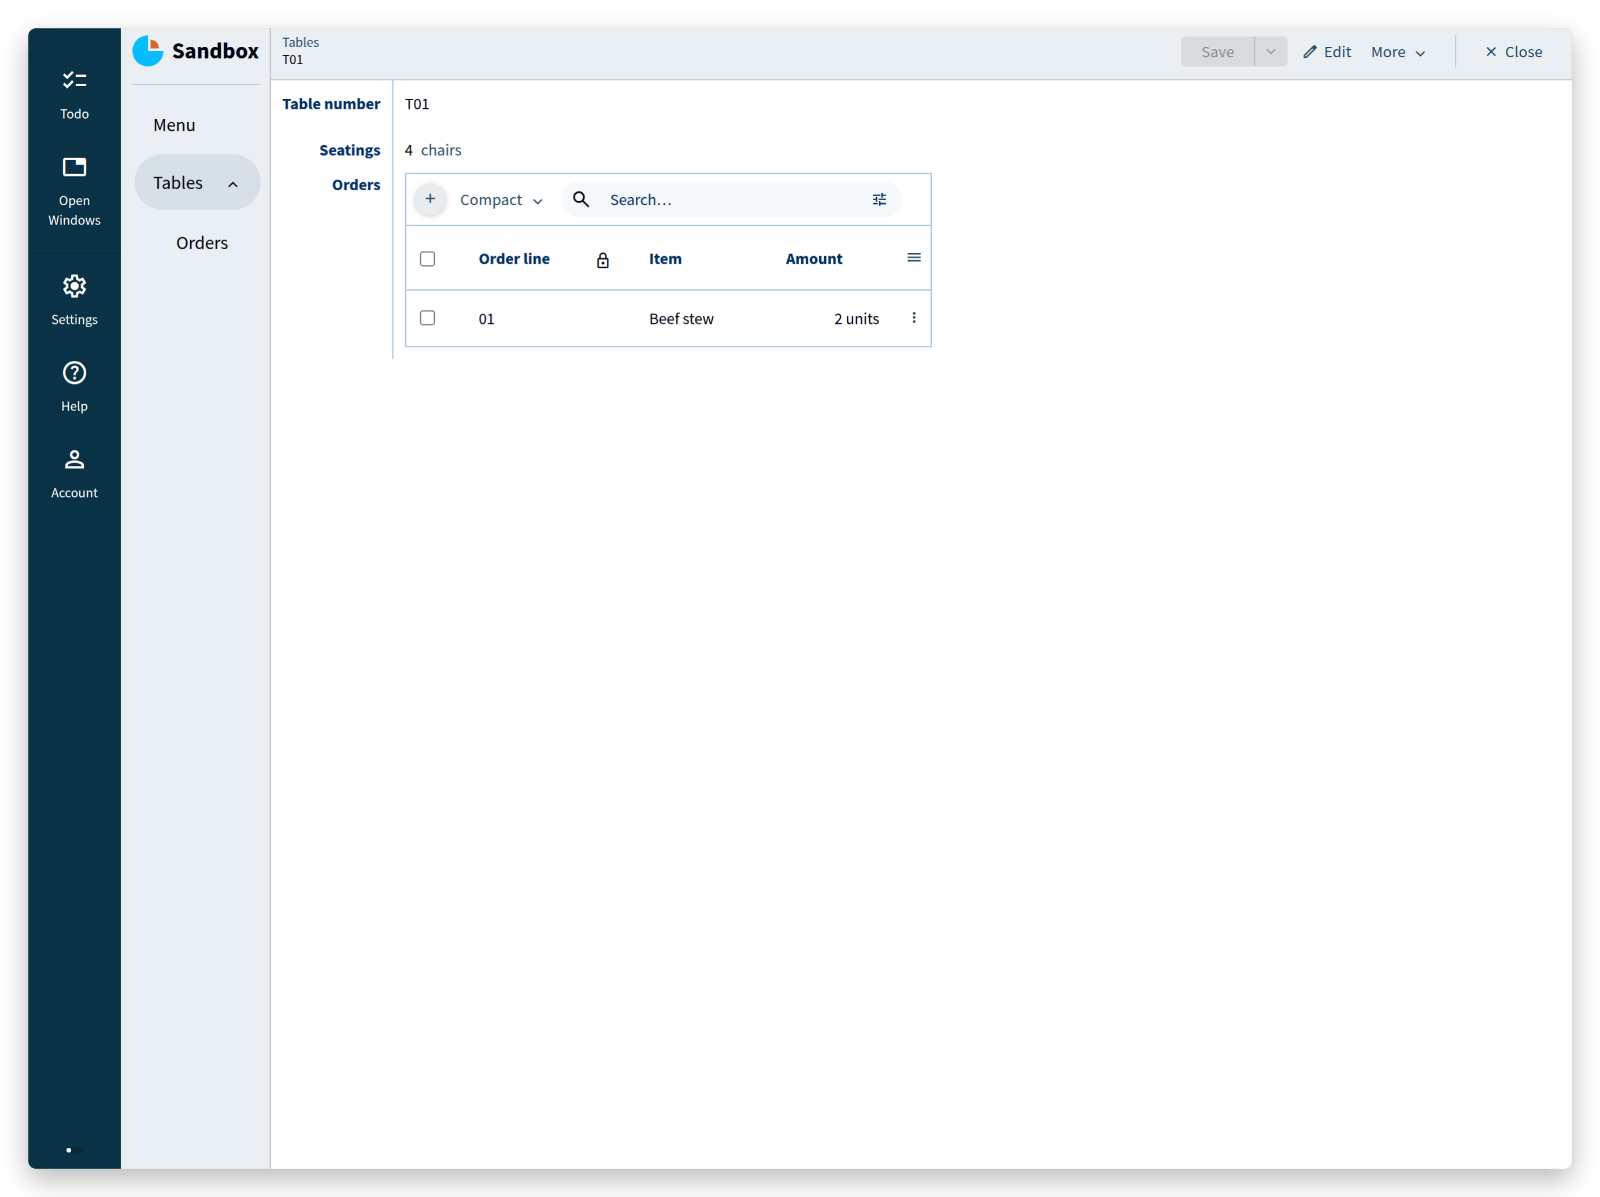
Sometimes a reference should be optional rather than mandatory.
That is common for data imported from other systems, which you cannot force to respect your keys.
An optional reference uses ~> (tilde arrow) instead of -> (dash arrow).
States versus references
By now the structure of the model should be readable to you: collections, nodes, attributes, states, and references. Time for a change in the restaurant.
A fixed set of beverage types turns out to be impractical: bartenders keep inventing categories.
Replace the fixed states by a collection of beverage types.
Remove the states of the Beverage type attribute, add a collection Beverage types, and let the state Beverage reference an item from it:
users
	anonymous

interfaces

root {
	'Beverage types': collection ['Beverage type'] {
		'Beverage type': text
	}

	'Menu': collection ['Item name'] {
		'Item name': text
		'Selling price': number 'eurocent'
		'Item type': stategroup (
			'Dish' {
				'Dish type': stategroup (
					'Appetizer' { }
					'Main course' { }
					'Dessert' { }
				)
			}
			'Beverage' {
				'Beverage type': text -> ^ ^ .'Beverage types'[]
			}
		)
	}

	'Tables': collection ['Table number'] {
		'Table number': text
		'Seatings': number 'chairs'
		'Orders': collection ['Order line'] {
			'Order line': text
			'Item': text -> ^ ^ .'Menu'[]
			'Amount': number 'units'
		}
	}
}

numerical-types
	'eurocent'
		@numerical-type: (
			label: "Euro"
			decimals: 2
		)
	'chairs'
	'units'
Note that Beverage types goes above the Menu.
That is logical — beverage types exist before a menu uses them — and the compiler requires it: by default, expressions in an application model point to attributes defined earlier in the model.
That rule is what allows the language to guarantee that computations terminate and stay consistent; the docs explain it in detail.
Build, deploy, and select Beverage types in the left column:
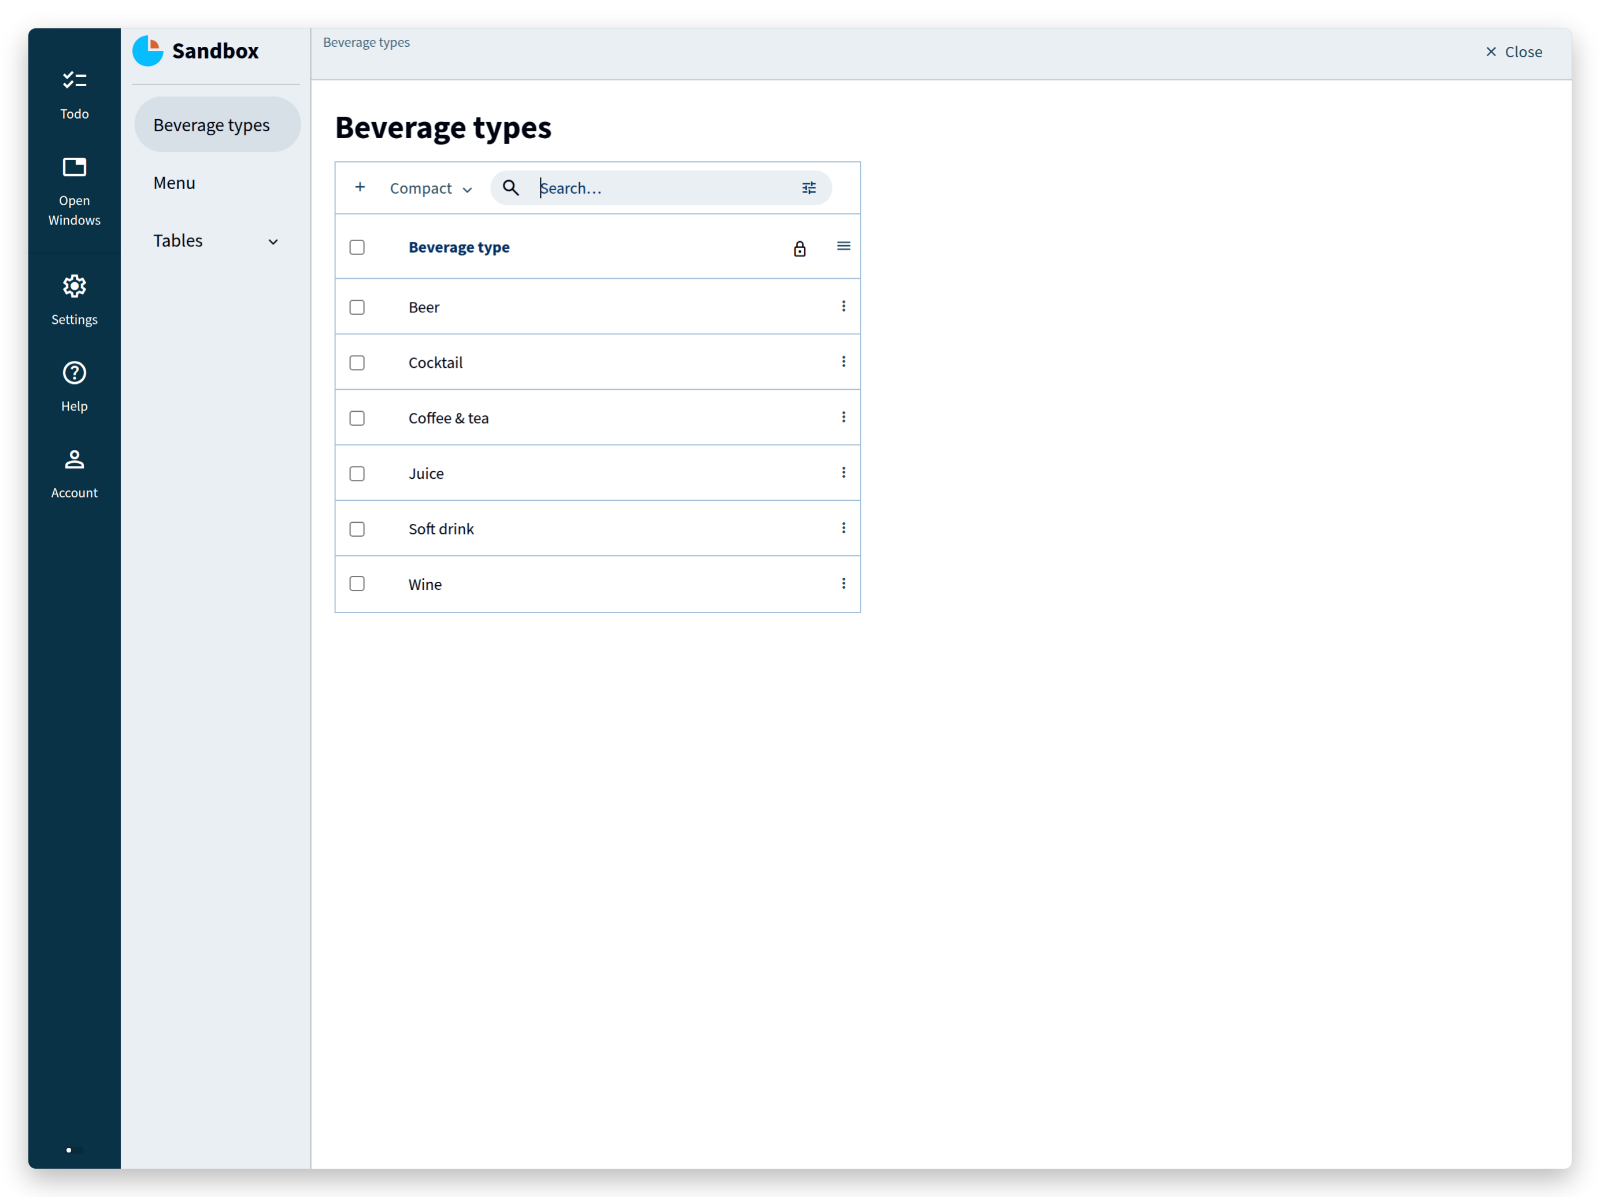
You can now add and adjust beverage types while using them in the menu:
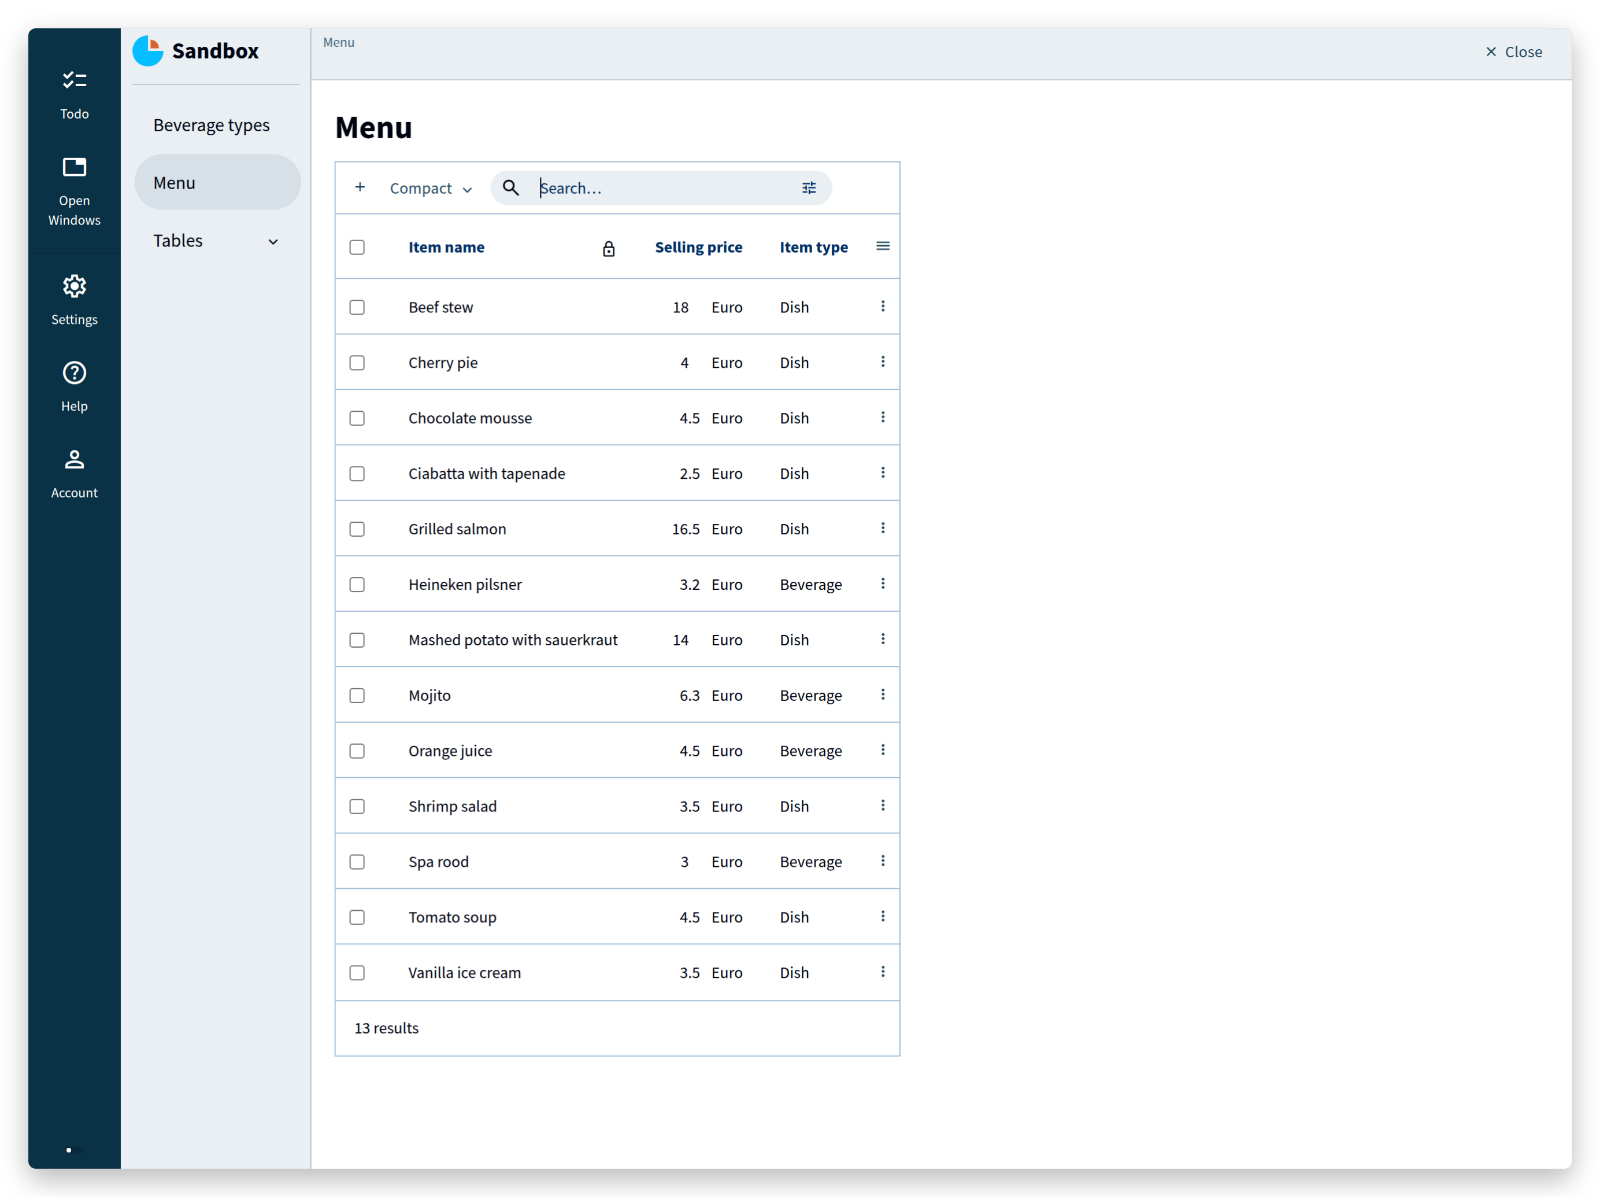
Click ‘Mojito’, then Edit in the top right corner:
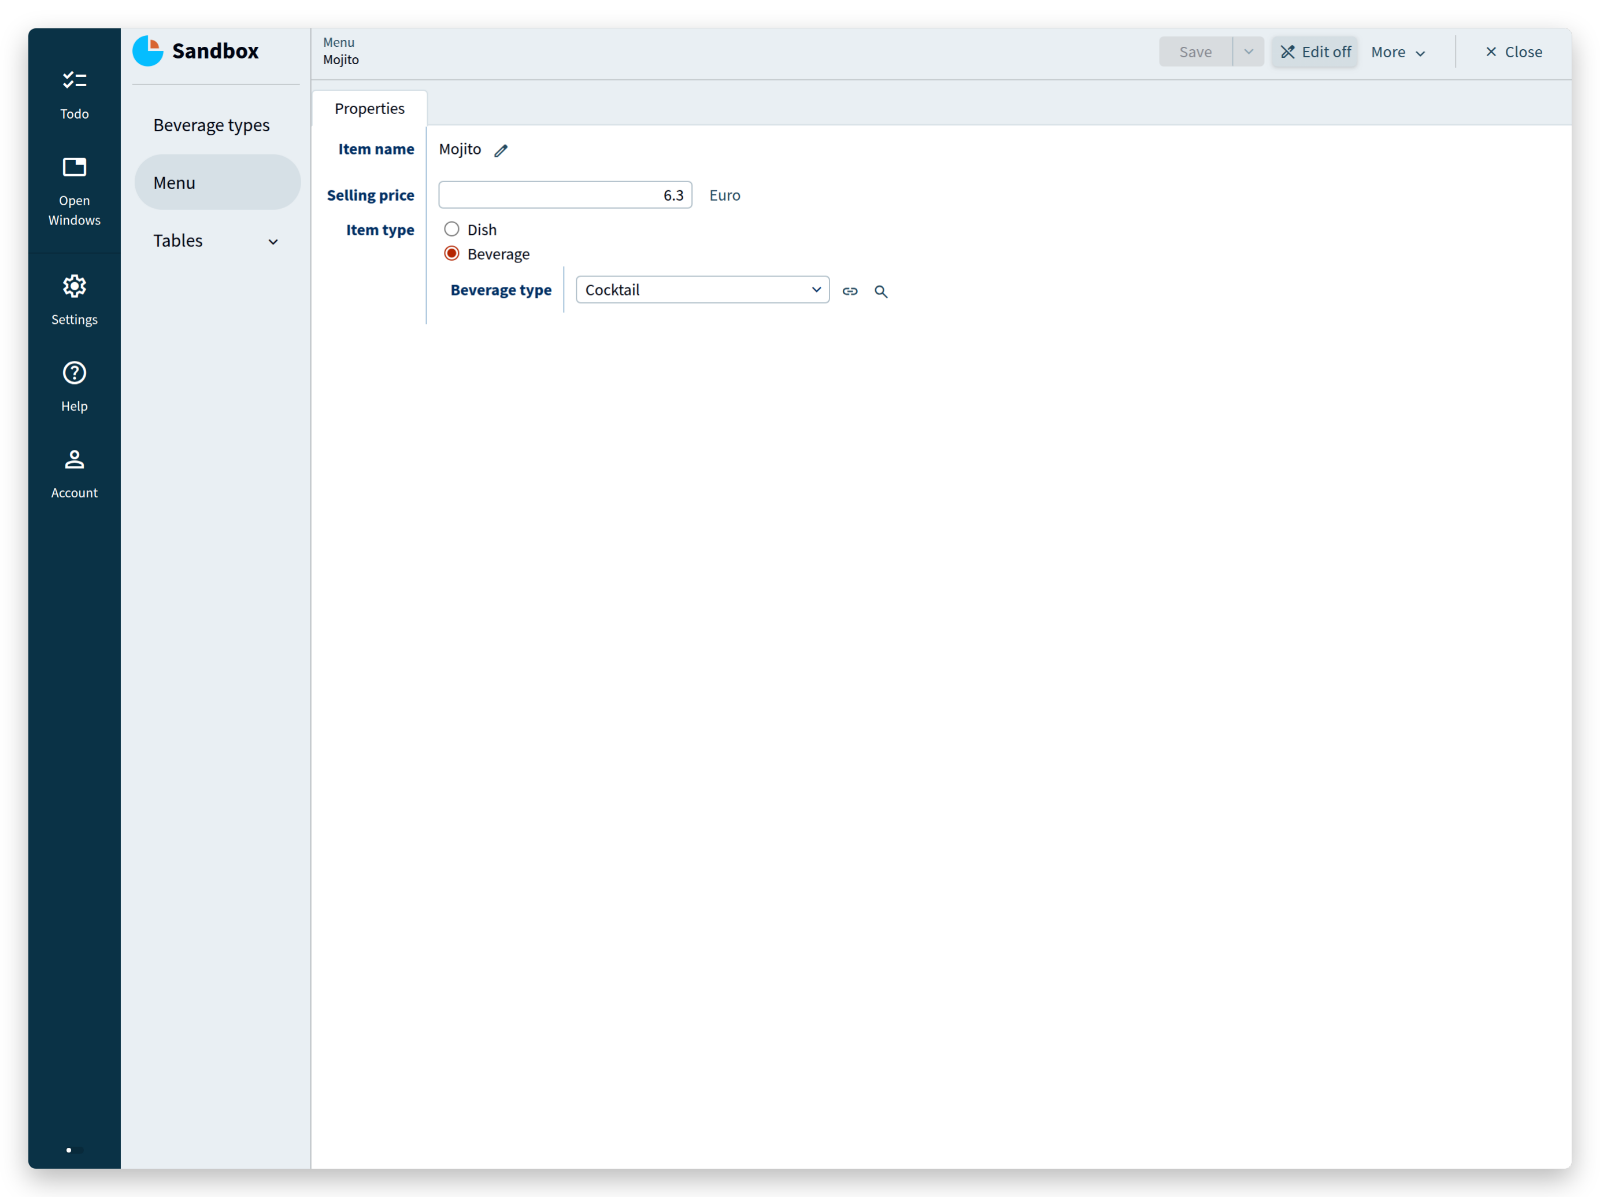
Then click the magnifier next to Beverage type:
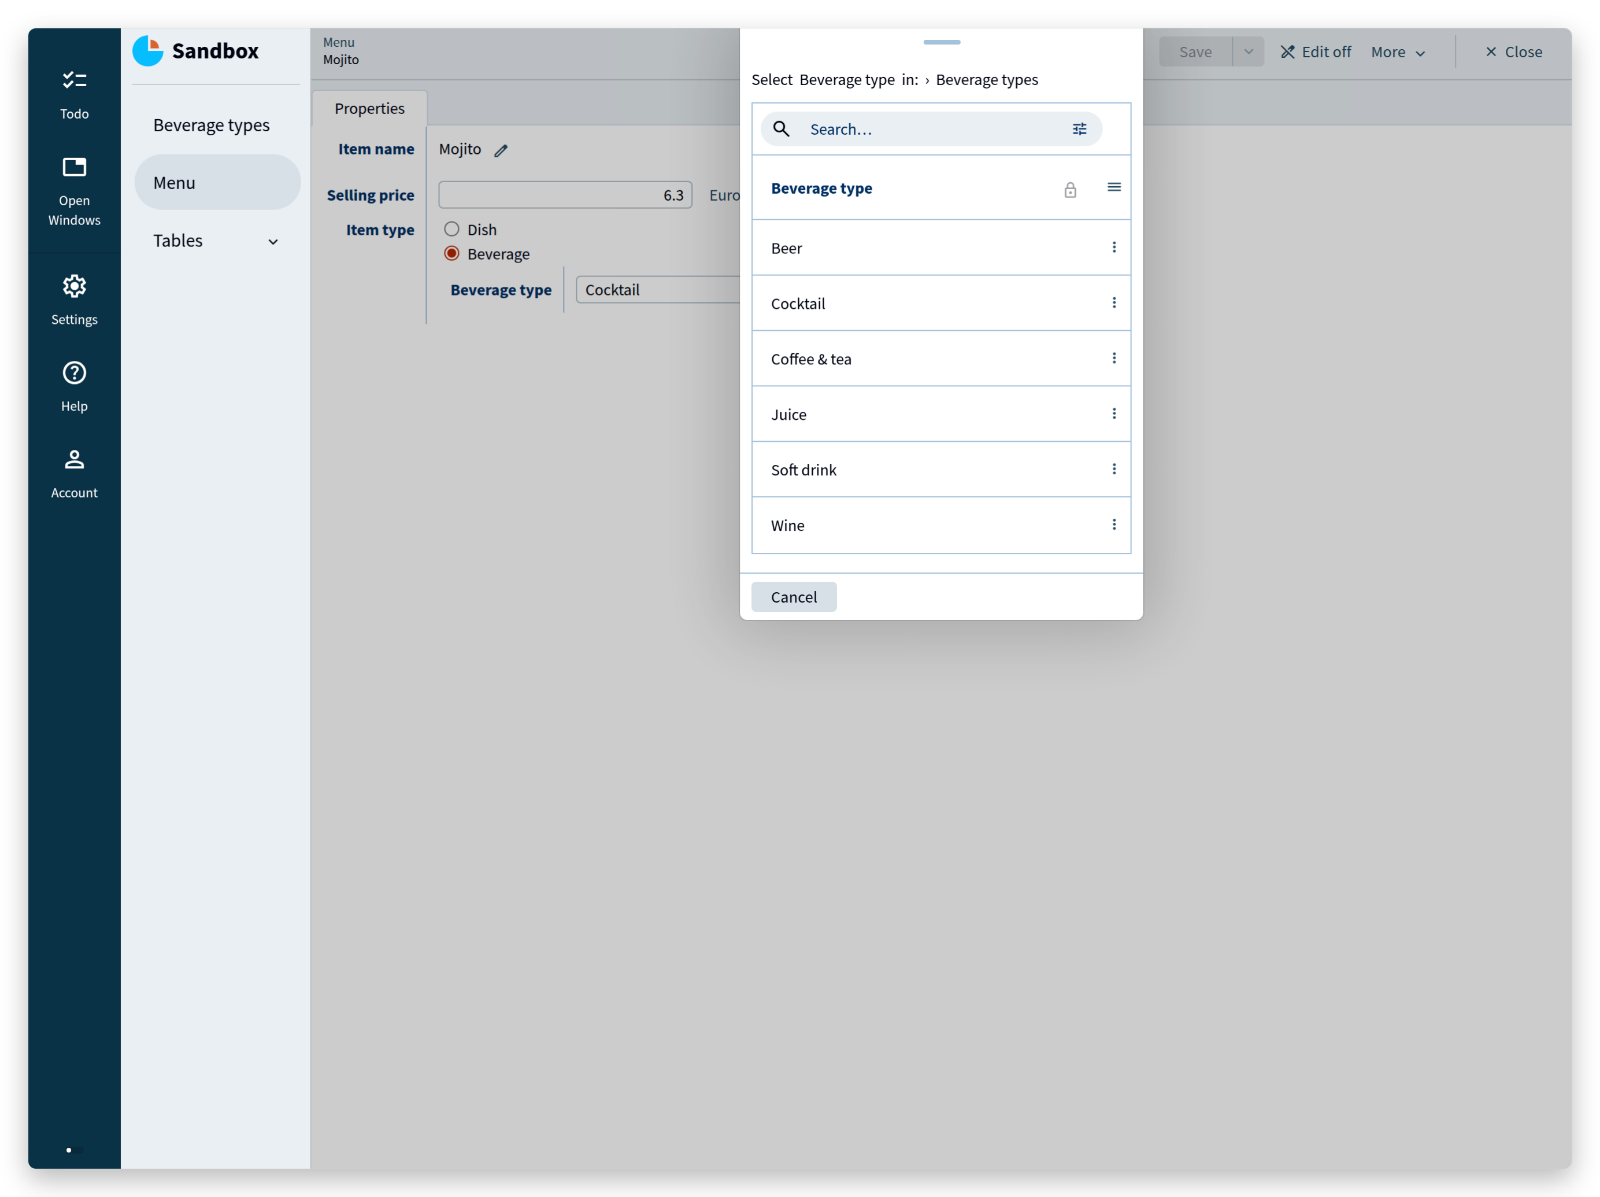
The Beverage types collection appears, just like the Menu items earlier, and one of them can be chosen for ‘Mojito’.
<tutorial folder:
./_docs/tutorials/restaurant1/2026.2/step_04/>
Next
This concludes the introduction to the application language.
You can now design a data model of your own and generate an app from it.
Two pieces of advice for your own application:
- Begin with the end in mind. What is the purpose of the app, which data does that purpose require, and how does that data organize into collections?
- Experiment. Try things out. Restructuring a model is cheap, and parts of a model are easy to reuse.
There is more to discover. Part II covers derived values, reference sets, commands, and actions. Questions or comments about the tutorial or the platform are welcome on the forum.